
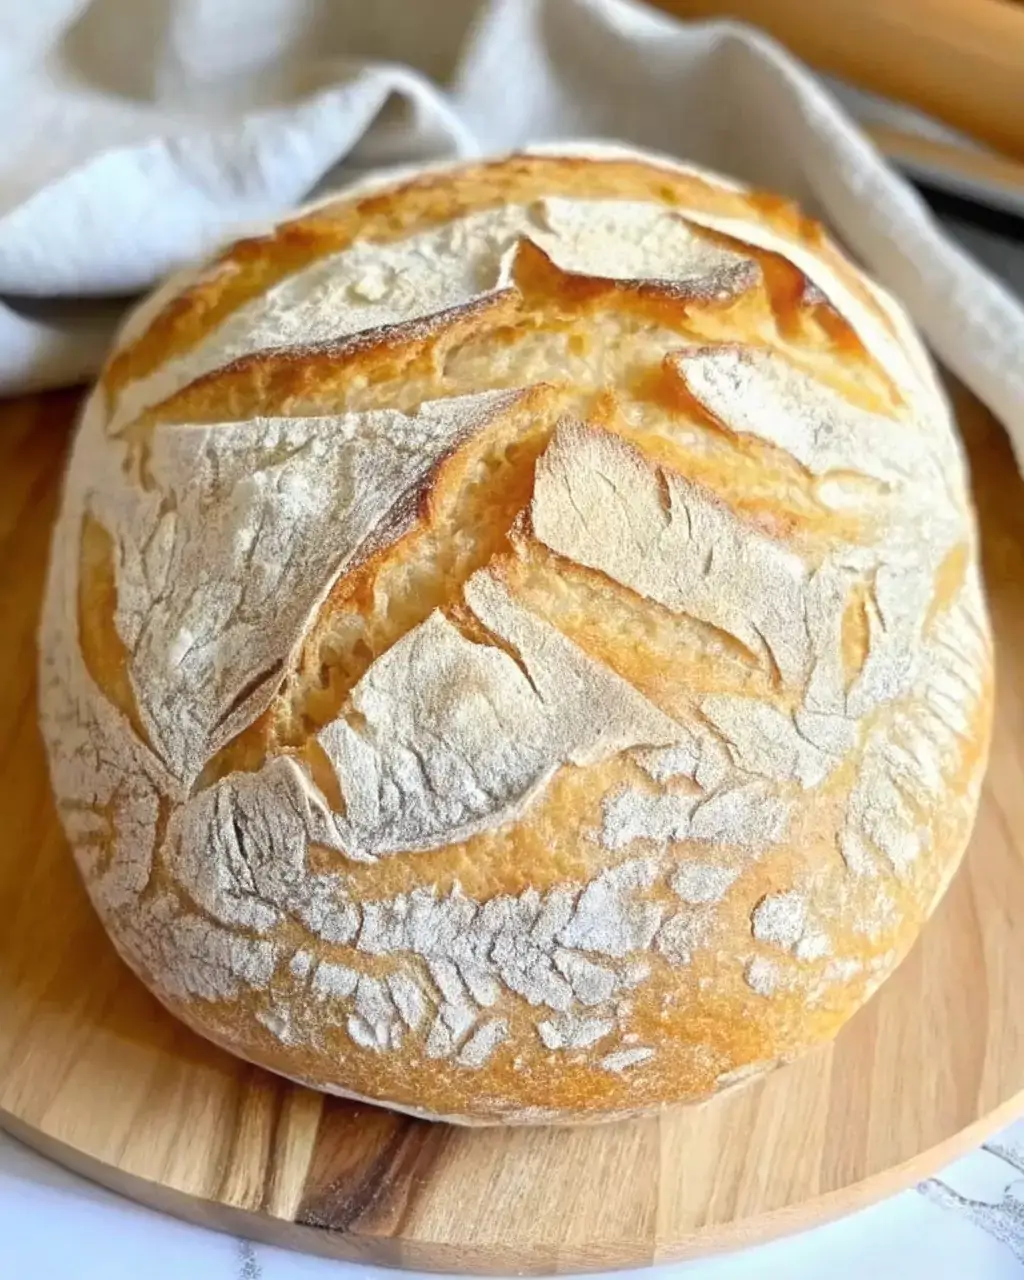
Baking no knead gluten free bread is a simple and rewarding way to enjoy fresh, homemade loaves—without the mess of kneading or the need for fancy equipment. If you’ve struggled with crumbly, dry, or overly gummy results, this guide will help you master the right texture using just a few basic tools. By choosing the best gluten free flour blend, adjusting hydration levels, and allowing the dough to rest properly, you can create gluten-free bread that looks and tastes like it came from a bakery.
Key Takeaways:
- No knead gluten free bread is beginner-friendly—no kneading or stand mixer needed. All you need is a quality flour blend, proper water ratio, and enough resting time for a soft, risen loaf.
- Using binders like psyllium husk or xanthan gum helps recreate the structure of gluten, while baking in a Dutch oven adds a golden, crispy crust that elevates the final result.
- When stored properly, this bread stays moist and flavorful. It freezes well and can be customized with your favorite add-ins, making it perfect for both sweet and savory creations—no stress involved.
Why No Knead Gluten Free Bread Is Worth Making
Why Gluten-Free Bakers Love This Method
If you’re fed up with battling sticky gluten-free dough, this no knead method is a game-changer. It eliminates kneading altogether—just mix the ingredients, let it rest, and bake. No need for a stand mixer or fancy tools.
This hands-off technique is perfect for beginners or anyone with a tight schedule. Thanks to a high hydration level and extended resting time, the dough develops a soft, airy texture and deep, fermented flavor—all without needing gluten structure.
Even better? It’s a flexible process. Traditional gluten-free recipes often depend on exact measurements and timing, but no knead dough becomes more forgiving as it ferments, offering great results with less stress.
Want more like this? Check out our favorite gluten-free baking recipes or explore delicious breakfast breads that go perfectly with this loaf.
How This Recipe Makes Gluten-Free Baking Easier
Forget complicated steps—this recipe keeps things simple. By dialing in hydration and rest, you avoid common gluten-free issues like crumbly slices, collapsed middles, or dense texture. You’ll only need one bowl, and after an 8–12 hour rest, the dough is ready to bake.
That long fermentation allows starches and binders to absorb water and form a cohesive, airy structure. Key ingredients like psyllium husk or xanthan gum play a crucial role, giving the dough elasticity and support. Paired with a high-quality gluten-free flour blend, these binders help the loaf rise evenly and stay soft.
Understanding Gluten-Free Dough Behavior
Why Gluten-Free Flour Acts Differently
In traditional baking, gluten forms a stretchy network that gives bread structure. But gluten-free flours rely on starches and gums instead. That means you can’t treat them the same way—extra water and longer resting periods are essential to create strength and texture.
In no knead gluten free bread, hydration does the work. It activates the binders, swells the starches, and creates a gel-like dough that holds air during baking, even without kneading.
And here’s a tip: avoid overmixing. Once your ingredients are stirred together, just let it rest. Over time, the dough will naturally thicken, rise, and develop flavor.
Curious to try more? Explore our guide to gluten-free bread types or compare with a wholesome oat-based gluten-free loaf.
For a scientific deep-dive, check out this expert explanation on gluten-free dough chemistry by America’s Test Kitchen.
How Hydration and Rest Time Affect Structure
Hydration plays a key role in gluten-free bread success. Since gluten-free flours take longer to absorb moisture, a long resting period is essential. For best results, aim for a dough with at least 80% hydration by weight. This higher water level helps form a gel-like consistency when combined with binders like psyllium husk, giving the dough flexibility and strength.
As the dough rests, gentle fermentation works its magic—creating a soft texture and subtle sour flavor. You’re looking for a dough that’s thick and scoopable. If it feels dry or overly firm, it won’t rise properly. If it’s too wet, it may spread out too much when baking. Once you lock in your ideal ratio, making this bread becomes practically effortless.
Ingredients That Make a Difference in No Knead Gluten Free Bread
Best Gluten-Free Flour Blends for No-Knead Dough
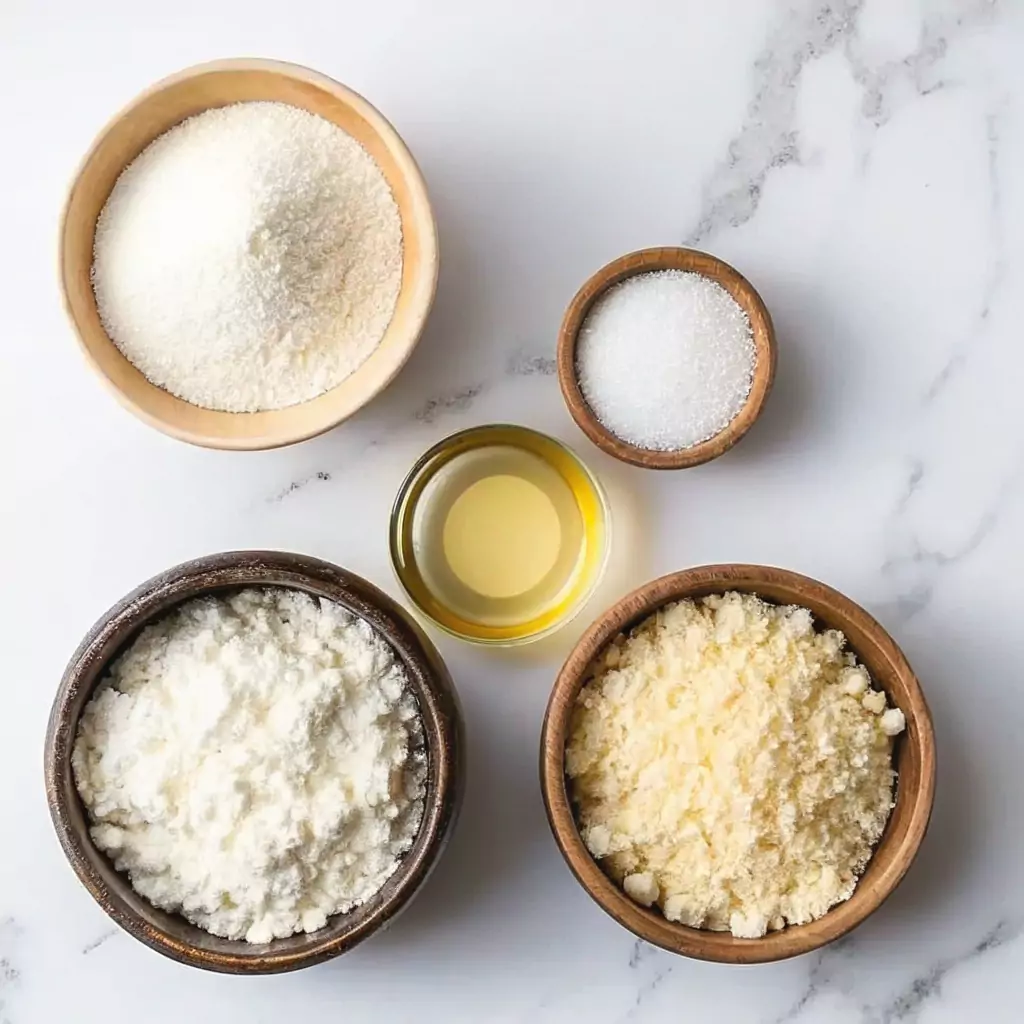
Choosing the right flour blend is essential—it’s truly half the battle when baking no knead gluten free bread. Not every mix is suited for this method. Look for blends that combine whole grains like brown rice or sorghum with starches such as tapioca or potato starch. This combo delivers both structure and softness for a balanced, tender crumb.
Avoid blends made from a single flour or those with a gritty texture. Pre-packaged “cup-for-cup” gluten-free mixes often include binders, but be sure to check the ingredients. Even if binders are listed, you may still need to add psyllium husk or xanthan gum for optimal results.
Need tried-and-true options? Try a rustic organic gluten free sourdough-style bread or a simple egg-free version to get started.
The Role of Psyllium Husk, Xanthan Gum, and Starches
In wheat bread, gluten provides the stretch and structure that traps air. Without it, you need alternatives to get the same effect. Psyllium husk is one of the best. When combined with water, it forms a gel that adds moisture retention, elasticity, and strength—resulting in a dough that holds together as it bakes.
Xanthan gum is another popular binder. It creates stability but doesn’t deliver the same chewy texture as psyllium. Some bakers use a combination of both for the best of both worlds. Meanwhile, tapioca starch and potato starch help soften the crumb and encourage crust browning—key for creating that artisan-style finish.
Common Mistakes When Making Gluten Free Bread (And How to Fix Them)

What Causes Gummy, Dense, or Undercooked Bread
A sticky or gummy center is one of the most frequent challenges when baking no knead gluten free bread. This is often due to three main issues: underbaking, slicing the loaf too early, or not using enough binder. Since gluten-free dough holds moisture longer than wheat dough, it’s essential to bake thoroughly. Always aim for an internal temperature of at least 205°F (96°C). No thermometer? Tap the bottom—if it sounds hollow, it’s done.
Also, let the bread cool for at least one hour before slicing. This rest period allows the interior to firm up. Skipping it often results in a mushy center. Don’t forget to check your recipe for binders. Without enough psyllium husk or xanthan gum, your loaf may turn out heavy and wet.
Need inspiration for healthy substitutions? Explore our protein smoothie without bananas or try a gluten-free honey oat bread with balanced carbs.
How to Adjust Moisture, Heat, and Rise Time
If your bread turns out too moist, slightly reduce the water or increase the psyllium husk. For loaves that feel too dry, raise the hydration level or use a flour blend with more starch. Fermentation times also vary with temperature: cooler rooms slow it down, while warm kitchens speed it up.
If the crust gets too dark too fast, try lowering the oven temperature or covering the loaf with foil for the final 15 minutes. These small tweaks help you dial in the perfect texture every time.
Tools and Techniques That Help With No Knead Gluten Free Bread
Why a Dutch Oven Helps Even Without Gluten
Baking your gluten-free bread in a Dutch oven is one of the easiest ways to improve crust and rise. Even without gluten, this method simulates a professional oven by trapping steam inside the pot. That steam is key to a tall rise and crisp crust during the first 15–20 minutes of baking.
Parchment paper makes it easy to transfer the sticky dough into the hot pot. Be sure to preheat the Dutch oven for 30 minutes so the heat distributes evenly. The heavy lid locks in moisture and boosts oven spring—that initial rise at the start of baking.
Looking for creative uses? Try similar techniques in our matcha bread pan or explore this artisan-style twist bread for more inspiration.
Temperature Control and Baking Hacks
Getting the oven temperature right is critical. If it’s too low, your loaf will be pale and underbaked. Too high, and the crust can burn before the center sets. Use an oven thermometer to ensure accuracy—many home ovens run off by 10–25°F.
To boost crispiness, remove the Dutch oven lid for the final 15–20 minutes. For a softer crust, wrap the loaf in a clean towel as it cools. Want it to last longer? Slice and store it in the freezer. Just toast slices as needed.
Pro tip: place a baking stone or steel beneath your Dutch oven to retain heat and avoid bottom scorching.
Flavor Boosts and Variations for No Knead Gluten Free Brea
Savory Add-Ins: Herbs, Olives, Seeds, and More
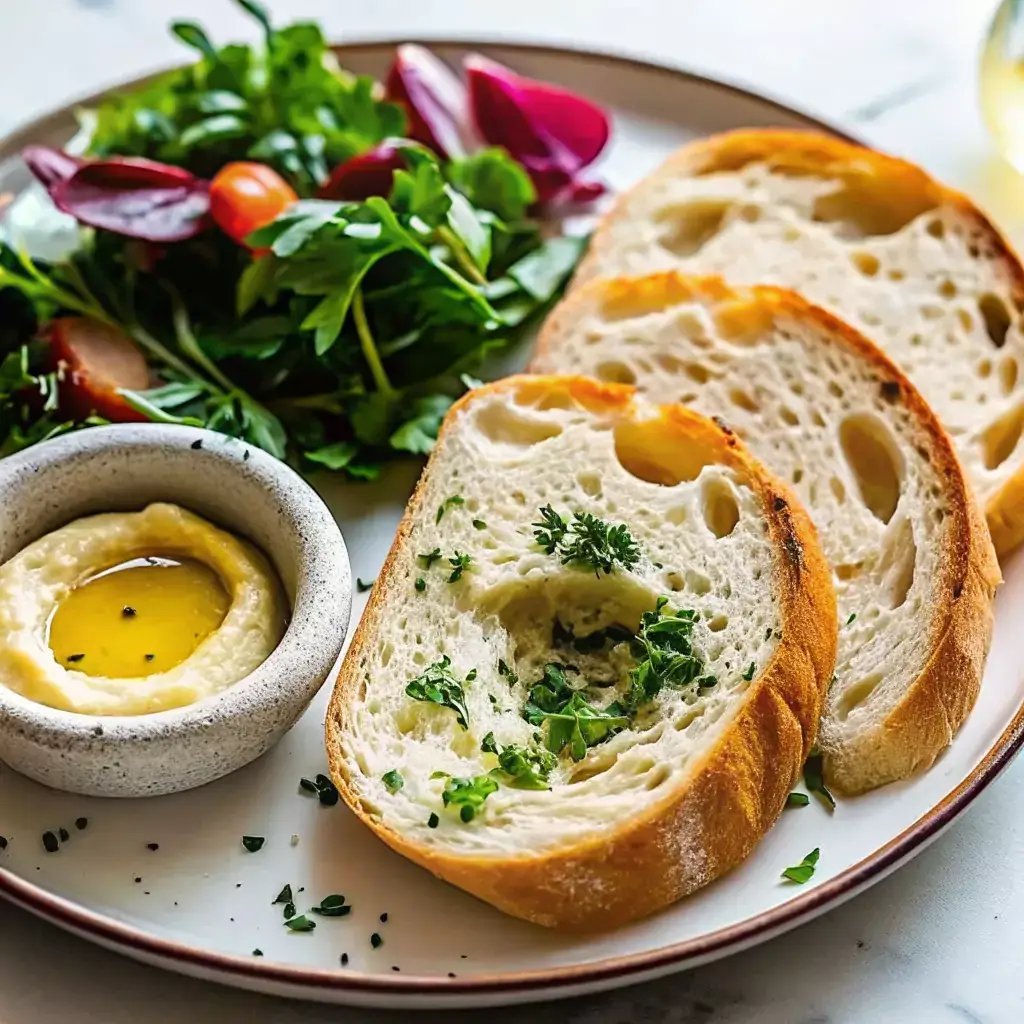
Your no knead gluten free bread doesn’t have to be plain. You can mix in delicious extras like herbs, spices, and seeds to create rich, savory flavors. Rosemary, thyme, and oregano go great with garlic or onion powder. Add these right after mixing in the flour so they infuse while the dough rests.
Want a Mediterranean twist? Add chopped olives, sun-dried tomatoes, or caramelized onions. For crunch and nutrition, toss in pumpkin or sunflower seeds. Just be sure to use dry or drained ingredients, as extra moisture can ruin the dough’s texture.
Looking for more flavor inspiration? Check out our cheesy garlic chicken wrap or this bold pepper steak recipe.
Sweet Ideas: Raisins, Cinnamon, and Honey Twists
Craving a sweeter slice? Add cinnamon, nutmeg, or a splash of vanilla extract. Dried fruits like raisins, cranberries, or figs work beautifully. A spoonful of honey or maple syrup deepens the flavor and helps with browning.
Just go easy with sugary ingredients—they can ferment too quickly or scorch during baking. Spread them evenly throughout the dough and use parchment paper to avoid sticking.
For an extra treat, dust the top of your loaf with cinnamon sugar before baking. It caramelizes into a golden crust that’s both pretty and delicious—especially when made in a Dutch oven.
Storing, Freezing, and Reheating Gluten Free Bread
How to Keep It Fresh Without Drying Out
No knead gluten free bread is at its peak the day it’s baked, but you can preserve its freshness for several days with smart storage. Once the loaf has completely cooled, wrap it in a clean kitchen towel or place it in an airtight bread box. Avoid using plastic at room temperature—it can trap excess moisture, soften the crust, or cause mold.
For short-term storage (up to 48 hours), keep the loaf unsliced at room temperature. This helps retain internal moisture and prevents premature drying. If you’ve baked extra loaves, only slice what you need and store the rest whole.
Pair your bread with comforting sides like chicken and cabbage soup or a green bean casserole for a balanced, gluten-free meal.
Best Practices for Freezing and Reheating
Want to enjoy your gluten-free bread over time? Slice it before freezing to make reheating easier. Wrap individual slices in parchment paper, then seal them in a freezer-safe bag or container to avoid freezer burn.
When you’re ready to eat, skip the microwave—use a toaster or preheated oven (350°F / 175°C) for 8–10 minutes. This restores crispness to the crust and revives the chewy texture.
Avoid microwaving, which can leave the crumb soggy or rubbery. For best results, toast slices directly from frozen or let them thaw slightly on the counter first.
FAQs About No Knead Gluten Free Bread
What is the trick to making good gluten free bread?
The secret is in the high hydration, a trusted gluten-free flour blend, and a dependable binder like psyllium husk. Allowing the dough to rest lets it fully hydrate and ferment, which improves both flavor and structure. Baking in a Dutch oven also helps produce a golden crust and moist center.
What is the biggest challenge of making gluten free bread?
The biggest hurdle is recreating that soft, chewy texture without gluten. Gluten traps air and provides stretch. Without it, the balance of binders and hydration becomes critical. Too little binder = crumbly loaf. Too much water = gummy texture. Getting the flavor right also takes time, as some gluten-free flours taste bland without proper seasoning or fermentation
Can you develop gluten without kneading?
No. Gluten development requires kneading in wheat-based doughs. But gluten-free recipes don’t need gluten—psyllium husk or xanthan gum create a structure that mimics gluten’s job by forming a gel that traps air.
Does gluten-free flour need to be kneaded?
No. Gluten-free flours don’t have the proteins needed for traditional kneading. Instead, resting the dough allows it to absorb water and develop structure. That’s why no knead gluten free bread is ideal—it works with the natural properties of these flours.
Conclusion
No knead gluten free bread brings the joy of baking back to anyone avoiding gluten. With no kneading required, this method relies on hydration, resting time, and trustworthy ingredients to create a loaf that’s tender inside and crisp on the outside. Whether you’re new to gluten-free baking or a seasoned home baker, this approach delivers consistency and flavor without the fuss.
From choosing the right flour blend to adding your favorite herbs, seeds, or dried fruits, every detail enhances the final result. Once baked, proper storage and reheating methods help you enjoy your bread longer—whether fresh from the oven or toasted from frozen.
Ready to start? Pick a quality flour blend, prep your Dutch oven, and bake your first loaf. You might be surprised how easy and delicious gluten-free bread can be.